
The Ultimate Guide to Growing Your Own Cannabis in 2024 🌱✨
Ready to start growing your own cannabis? Our ultimate guide walks you through the entire process, from setup to harvest, with tips for both beginners and seasoned growers. Let’s get growing!

Cannabis cultivation has come a long way in recent years, and more people are choosing to grow their own cannabis. Whether you want to cultivate for medical purposes, recreational enjoyment, or just as a fun hobby, there’s nothing quite like harvesting your own buds. 🌿 But where do you begin? Growing cannabis can be a bit intimidating for newcomers, but with the right knowledge, it can also be incredibly rewarding!
In this guide, we’ll walk you through everything you need to know about growing cannabis—from choosing the right strain to setting up your grow space, and finally, harvesting your buds. Ready to get started? Let’s dive in! 🚀
Why Grow Your Own Cannabis? 🤔
Before we jump into the how-to part of growing cannabis, let’s take a look at why you might want to grow your own in the first place. There are a few key reasons that motivate people to start cultivating:
1. Control Over Quality 🏆
When you grow your own cannabis, you have full control over the quality. You can choose your preferred strains, control the environment, and use organic or eco-friendly growing methods. This ensures that the cannabis you harvest is pure, clean, and free from pesticides and chemicals.
2. Cost-Effective 💸
Buying cannabis from dispensaries can get expensive. Growing your own allows you to save money in the long run. Once you’ve set up your grow space, the ongoing costs of growing can be surprisingly affordable.
3. Satisfaction and Pride 🌿
There’s something incredibly satisfying about nurturing a plant from seed to harvest. It’s a fulfilling experience to watch your cannabis plants thrive and produce buds that you’ve grown yourself.
4. Customization 🛠️
Growing your own cannabis gives you the freedom to customize the cultivation process. Whether you want to focus on specific cannabinoids like CBD or THC or experiment with different growth techniques, the choice is yours!
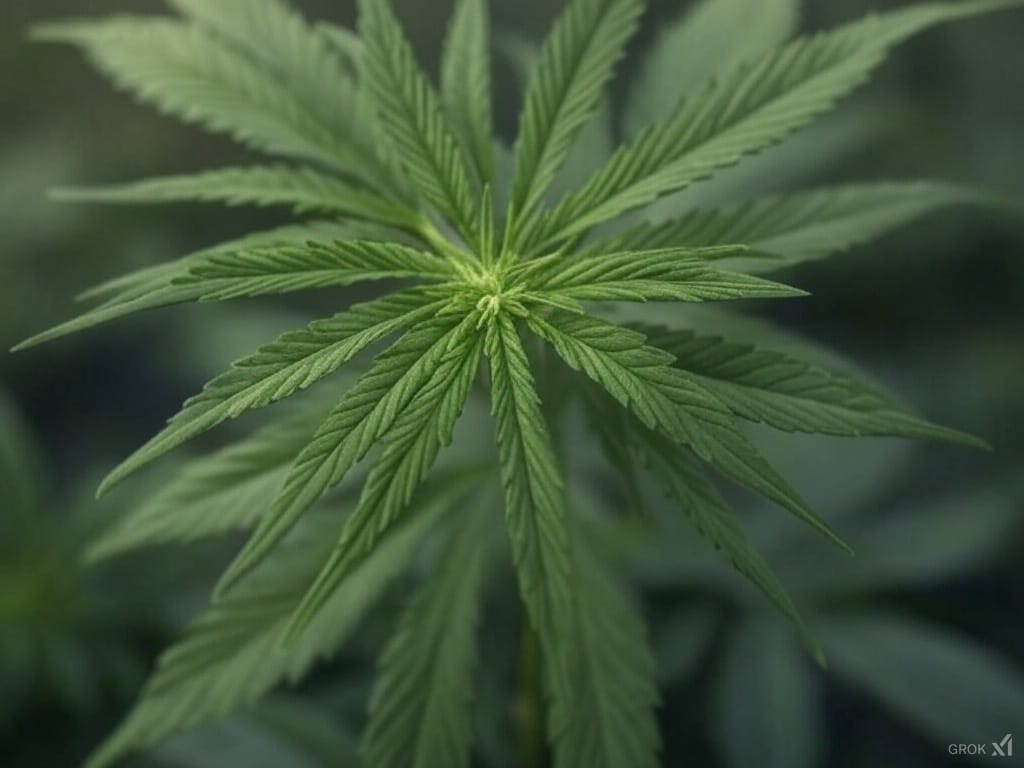
Step 1: Understanding Cannabis Plants 🌱
Before you jump into the actual growing process, it’s important to understand the basic anatomy and life cycle of a cannabis plant. Cannabis is a dioecious plant, meaning it has male and female plants. It’s the female plants that produce the buds that you smoke or consume.
Cannabis Strains: Indica, Sativa, and Hybrids 🌿
Cannabis plants come in three main varieties: Indica, Sativa, and Hybrid. Here’s a breakdown of each:
- Indica: Indica plants are typically shorter and bushier, with wider leaves. They are known for their relaxing, sedative effects, which makes them great for evening use.
- Sativa: Sativa plants are taller, with thinner leaves. They provide an uplifting, energizing effect, which is perfect for daytime use.
- Hybrid: Hybrids are a mix of both indica and sativa genetics. These strains can offer the best of both worlds, combining relaxing and energizing effects.
Choosing the right strain for your needs is essential! Whether you want a relaxing high or something that keeps you focused and creative, picking the right strain is the first step toward a successful grow.
Step 2: Setting Up Your Grow Space 🏠
The next step in your cannabis cultivation journey is setting up a proper grow space. Whether you have a spacious backyard or just a small corner in your apartment, the key is to create an environment that will allow your plants to thrive.
Indoor Growing 🏠
Indoor growing gives you complete control over your plants’ environment. Here’s a basic setup for an indoor grow:
- Grow Tent: A grow tent provides a controlled environment where you can adjust temperature, humidity, and airflow.
- Lighting: Cannabis needs light to grow! For indoor growing, you’ll need high-quality grow lights. Common options include LED lights, fluorescent lights, and high-intensity discharge (HID) lights.
- Airflow and Ventilation: Proper airflow and ventilation are essential for healthy cannabis growth. Invest in a good ventilation system to keep the air circulating and prevent mold and mildew.
- Temperature and Humidity: Keep your grow room at a temperature between 70-85°F (21-29°C) and humidity levels between 40-60% for the best results.
- Containers and Soil: Cannabis plants need good-quality soil to thrive. You can use organic soil or hydroponic systems for more advanced setups. Make sure your containers have good drainage to prevent root rot.
Outdoor Growing 🌞
If you live in an area with a suitable climate, outdoor growing can be a great option. Here are some things to consider:
- Sunlight: Cannabis plants need a lot of sunlight, typically 6-8 hours a day. Make sure your plants are in a spot that gets plenty of sun.
- Soil: Outdoor soil tends to be richer in nutrients, but you may need to amend it to ensure proper drainage and nutrient content.
- Protection from Pests: Growing outdoors means you’ll have to deal with pests. Use organic pest control methods or physical barriers to protect your plants.
Step 3: Planting Your Cannabis Seeds 🌱
Once your grow space is set up, it’s time to plant your seeds! There are two main ways to start your cannabis plants: seeds or clones.
Starting with Seeds
- Choose Your Seeds: You can buy cannabis seeds from dispensaries or online seed banks. Look for reputable breeders who offer high-quality seeds.
- Germination: Germinating your seeds is the first step in the process. You can use the paper towel method, where you place the seeds between wet paper towels until they sprout, or you can plant them directly into the soil.
- Planting: Once the seeds have germinated, plant them about 1-2 inches deep into the soil, with the sprout facing upward. Keep the soil moist but not soggy.
Starting with Clones
- Cloning: A clone is a cutting taken from a mature cannabis plant. It’s genetically identical to the mother plant, ensuring consistent results. Cloning can be a good option if you already have a healthy cannabis plant and want to maintain its traits.
- Rooting Clones: Place the clone in a rooting medium like a small pot with soil or a hydroponic system. It’s essential to maintain high humidity to encourage the roots to grow.
Step 4: The Vegetative Stage 🌿
Once your cannabis seeds or clones are planted, they will enter the vegetative stage of growth. This phase can last anywhere from 4 to 8 weeks, depending on the strain and growing conditions.
Lighting
During the vegetative stage, cannabis plants need about 18 hours of light per day (and 6 hours of darkness) to promote healthy growth. If you’re growing indoors, you can adjust your lighting schedule accordingly.
Watering
Cannabis plants are thirsty, but it’s essential not to overwater them. Water your plants when the top inch of soil feels dry to the touch. Always water thoroughly, but make sure your containers have proper drainage.
Nutrients
During the vegetative stage, your plants will need plenty of nitrogen to fuel their growth. Look for a nutrient mix that is high in nitrogen, but be sure to follow the instructions to avoid overfeeding your plants.
Training Your Plants
Many growers use training techniques like topping (cutting the top of the plant to encourage bushy growth), low-stress training (LST), or high-stress training (HST) to maximize yields and shape the plants. These methods help expose more parts of the plant to light, encouraging more bud sites.
Step 5: The Flowering Stage 🌸
The flowering stage is when cannabis plants begin to produce buds. This is the stage where your hard work really starts to pay off!
Lighting
To induce flowering, cannabis plants need a 12/12 light cycle (12 hours of light and 12 hours of complete darkness). This mimics the natural light cycle of fall, when cannabis plants would normally begin to flower.
Nutrients
During the flowering stage, cannabis plants need more phosphorus and potassium. These nutrients support flower development and help increase resin production.
Watch for Pests and Mold
As your buds start to form, be on the lookout for pests or mold. Use organic pest control methods like neem oil or insecticidal soap to protect your plants.
Step 6: Harvesting Your Cannabis Buds 🌿✂️
The final stage of growing cannabis is harvesting your buds. Harvesting too early can lead to lower potency, while waiting too long can result in overly mature buds with diminished quality.
Signs Your Plant Is Ready
- Trichomes: The best way to tell if your cannabis plant is ready for harvest is by looking at the trichomes (the tiny, crystal-like structures on the buds). When they turn cloudy or amber in color, your plant is ready to harvest.
- Pistils: The pistils (the hair-like structures on the buds) will also change color from white to orange/red as they mature.
Harvesting
When your plant is ready, carefully trim the buds from the branches using sharp scissors or pruning shears. Handle your buds gently to avoid damaging them.
Step 7: Drying and Curing 🌬️
After harvesting, your buds need to be dried and cured to maximize their flavor, potency, and smoothness.
Drying
Hang your buds upside down in a cool, dark place with good ventilation. This process usually takes about 7-10 days.
Curing
After drying, place your buds in glass jars to cure. Open the jars once a day for a few minutes to let fresh air in and prevent mold. This process can take anywhere from 2 to 4 weeks.
Conclusion: Grow and Enjoy! 🌱💚
Growing your own cannabis can be incredibly rewarding, and with the right knowledge, you can produce high-quality buds that are both satisfying and therapeutic. Whether you’re growing for medical reasons, recreation, or just for fun, this ultimate guide has covered all the essential steps—from setting up your grow space to harvesting your buds. Enjoy the process, take your time, and soon enough, you’ll be enjoying the fruits of your labor!
Happy growing! 🌿